Set up a test crypto wallet
Use MetaMask to complete the payer journey through a crypto-enabled Hubpay sandbox checkout.
Sepolia is Ethereum's test network. Sepolia ETH and tokens have no real-world value and cannot be moved to the live Ethereum network.
If you only need to test API status changes and webhooks, use sandbox test journeys. The simulator does not require a wallet or test tokens.
Do not connect a wallet that contains real funds. Never send real cryptocurrency to a sandbox payment, and never share your recovery phrase or private key with Hubpay, a faucet or anyone offering support.
Allow about 10 minutes for setup. You can use either the MetaMask mobile app or the MetaMask browser extension.
1. Install MetaMask
Open the official MetaMask website and install:
- Mobile: the MetaMask app for iOS or Android.
- Desktop: the MetaMask extension for your browser.
Only install MetaMask through its official website. Fake wallet apps and extensions can steal recovery phrases and funds. See MetaMask's official installation guide if your screen looks different.
2. Create a test wallet
- Open MetaMask and select Create a new wallet.
- Choose the available setup method that follows your organisation's security policy.
- Complete the on-screen setup.
- If MetaMask gives you a recovery phrase, write it down and store it somewhere private and offline.
For more detail, see MetaMask's official wallet creation guide.
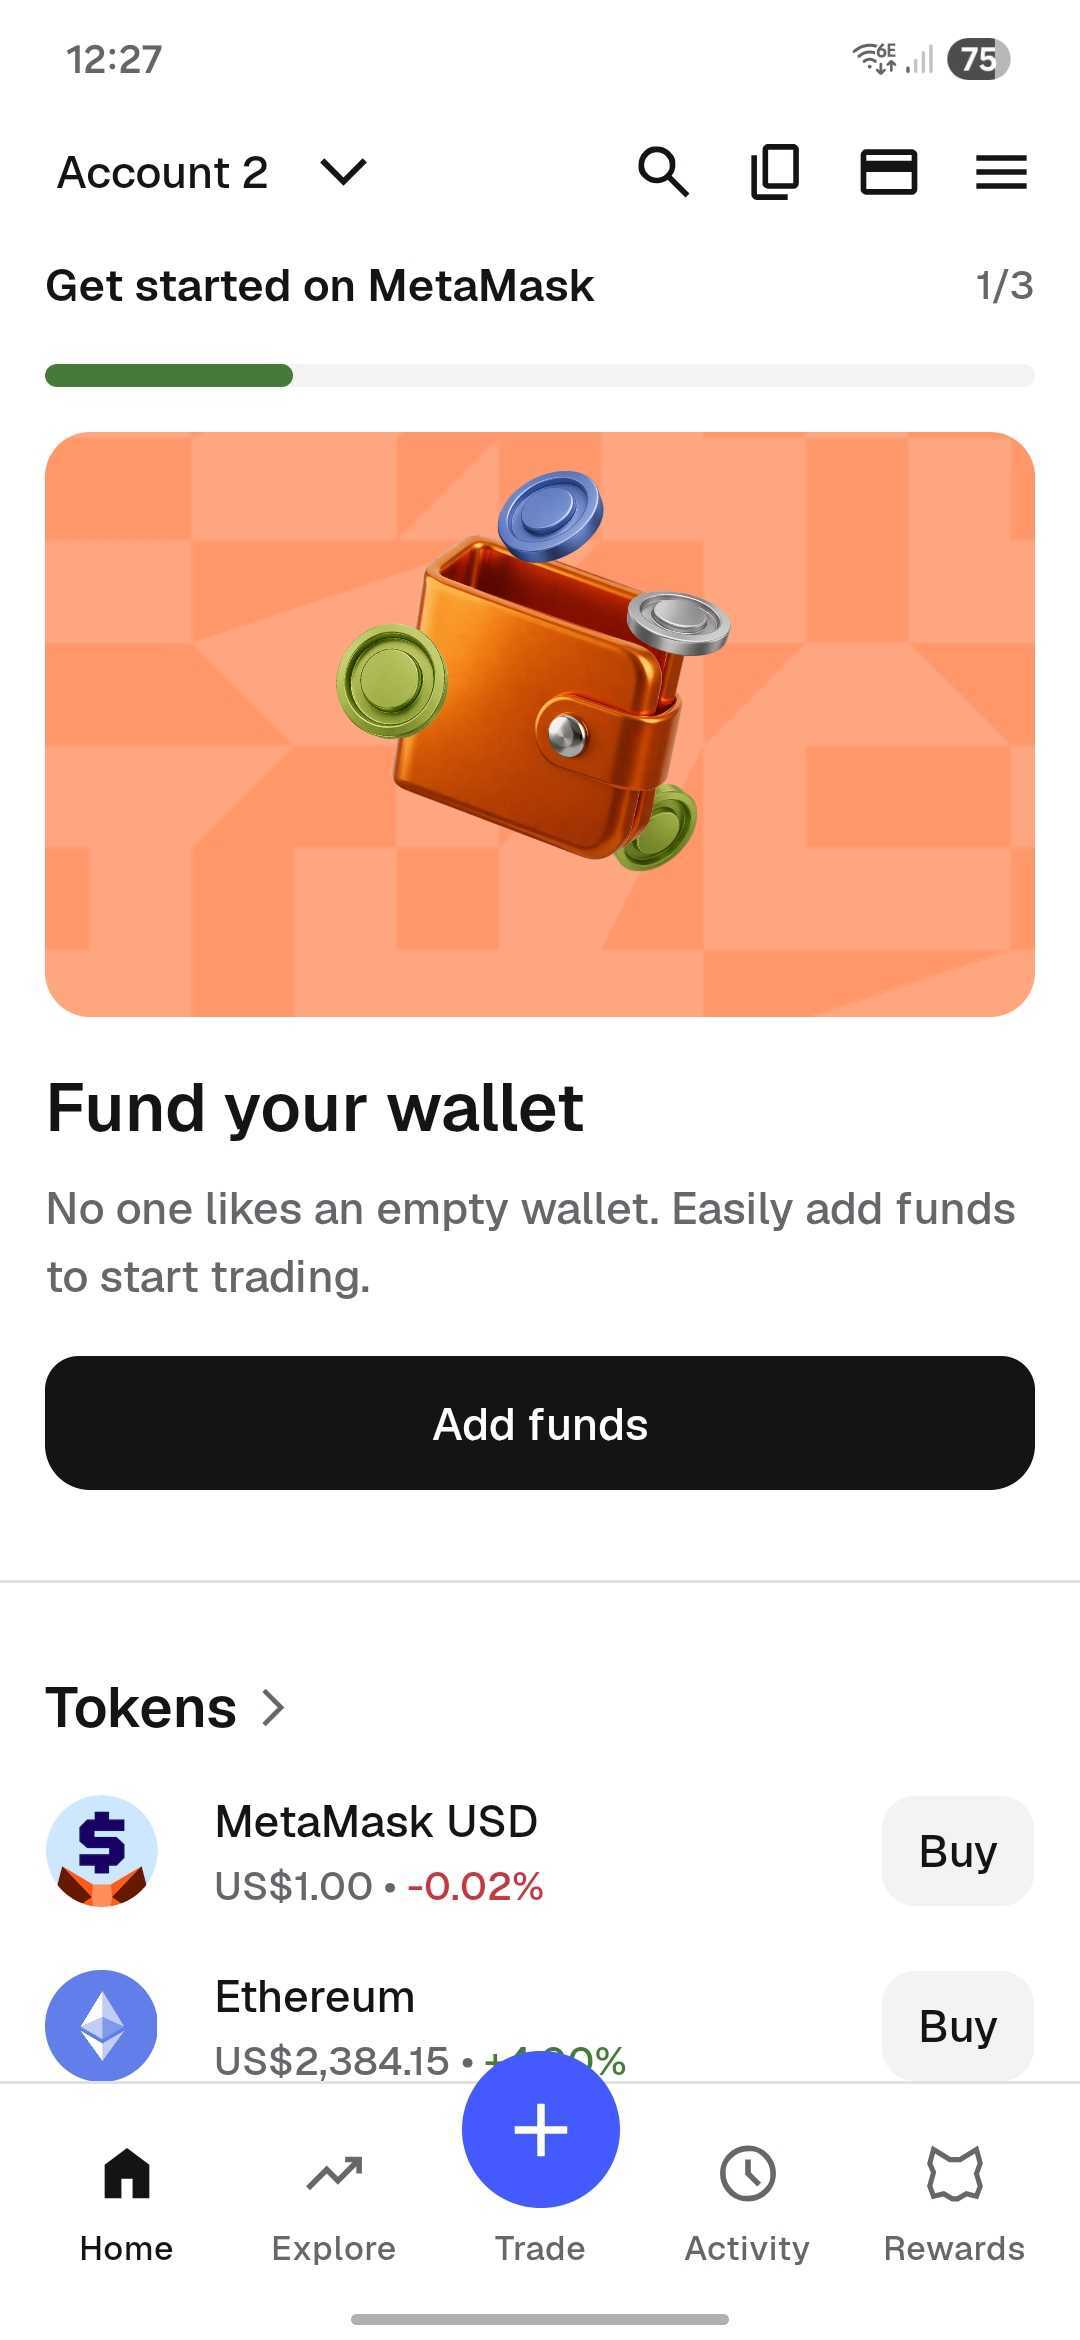
After setup, MetaMask opens on the wallet home screen. Select Tokens to manage networks and assets.
3. Enable Ethereum Sepolia
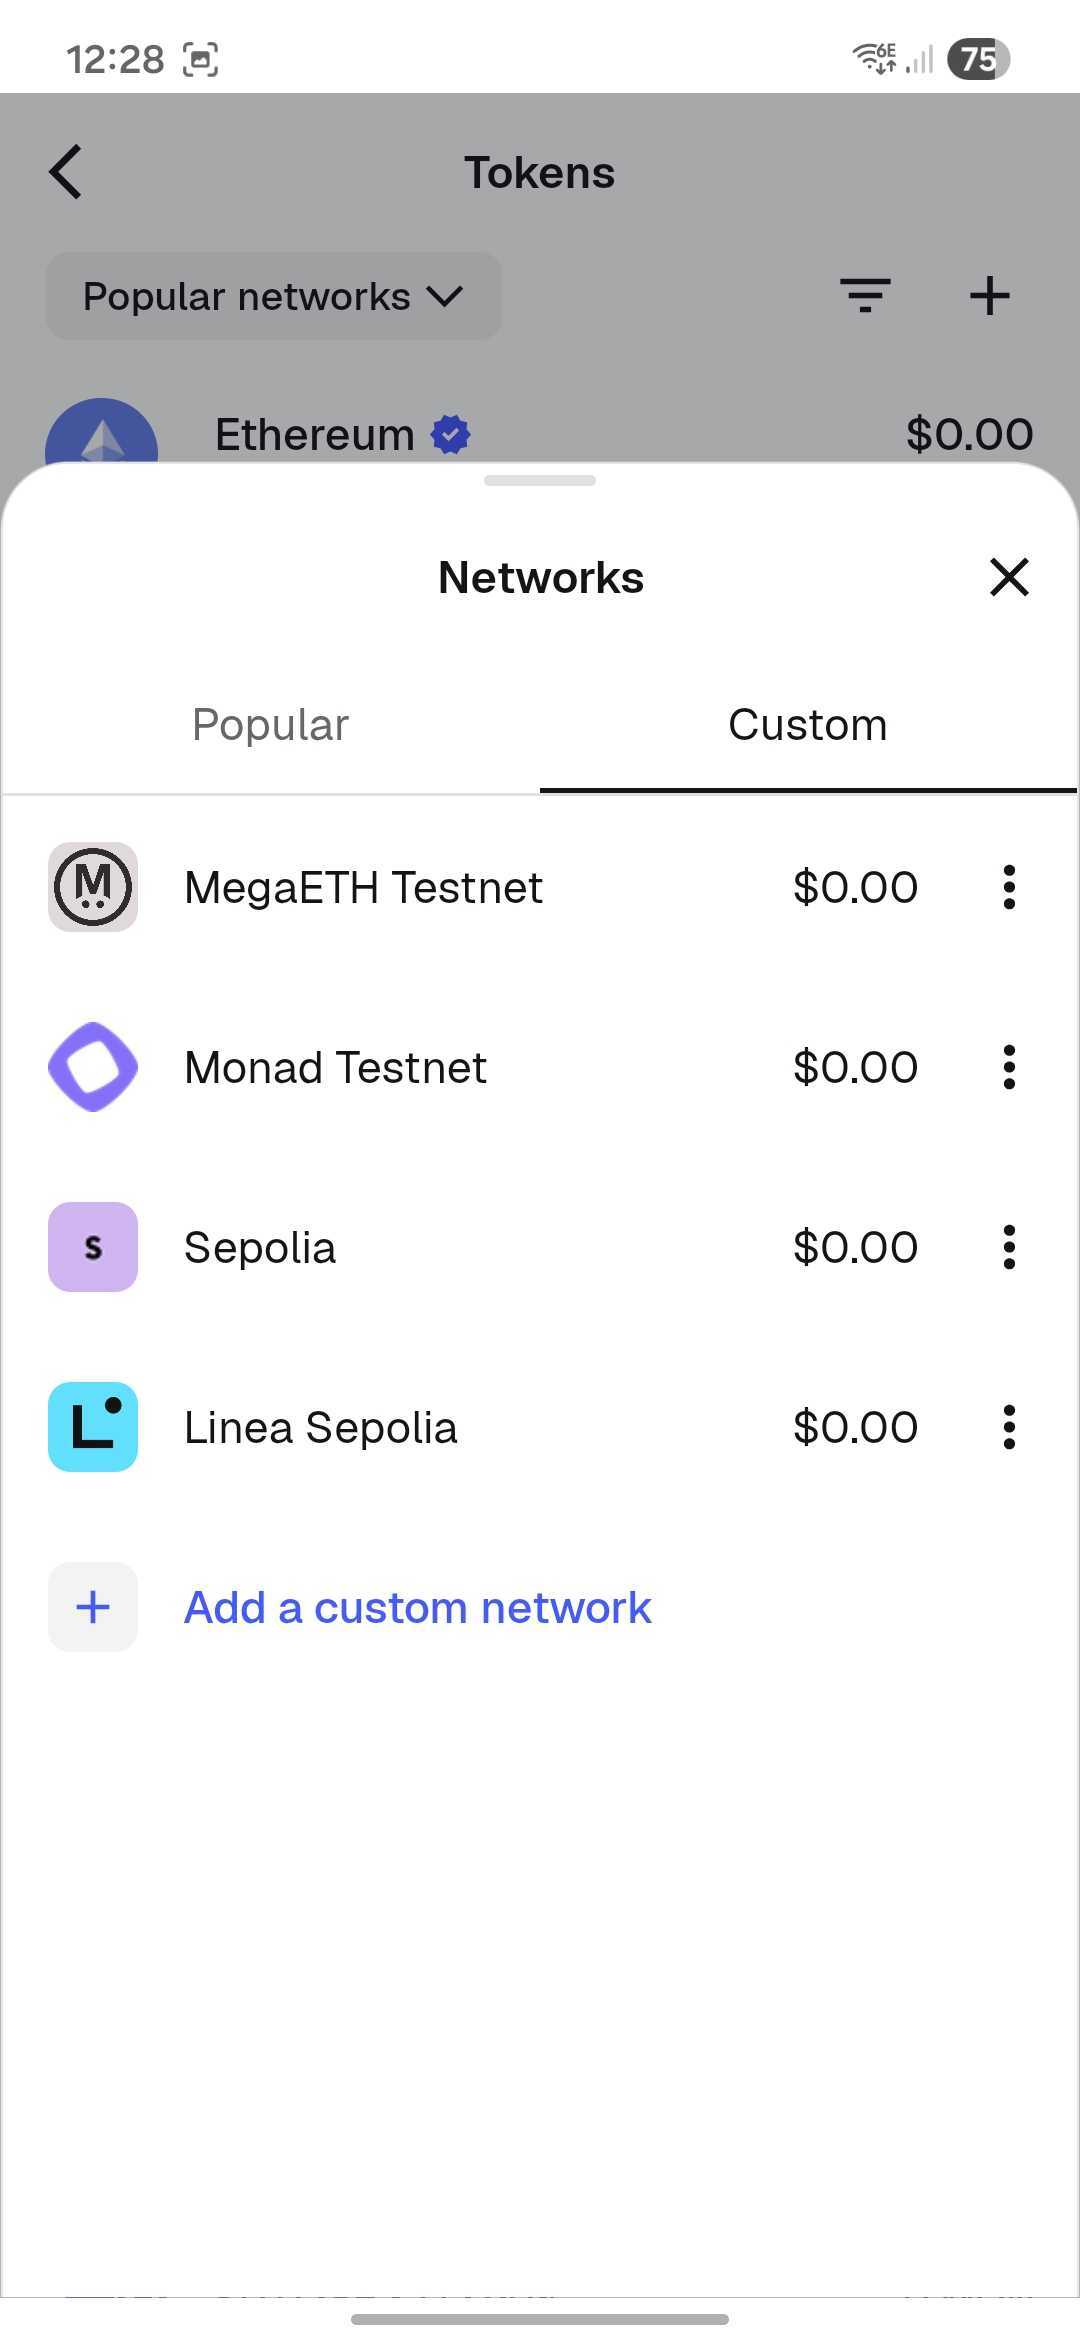
- Open the network list:
- Mobile: open the Tokens tab and select the networks dropdown at the top.
- Browser extension: open MetaMask's menu and select Networks.
- Scroll to the bottom of the network list.
- Turn on Show test networks.
- Select Sepolia.
See MetaMask's official testnet instructions if Sepolia does not appear.
On mobile, choose Sepolia from the network list:
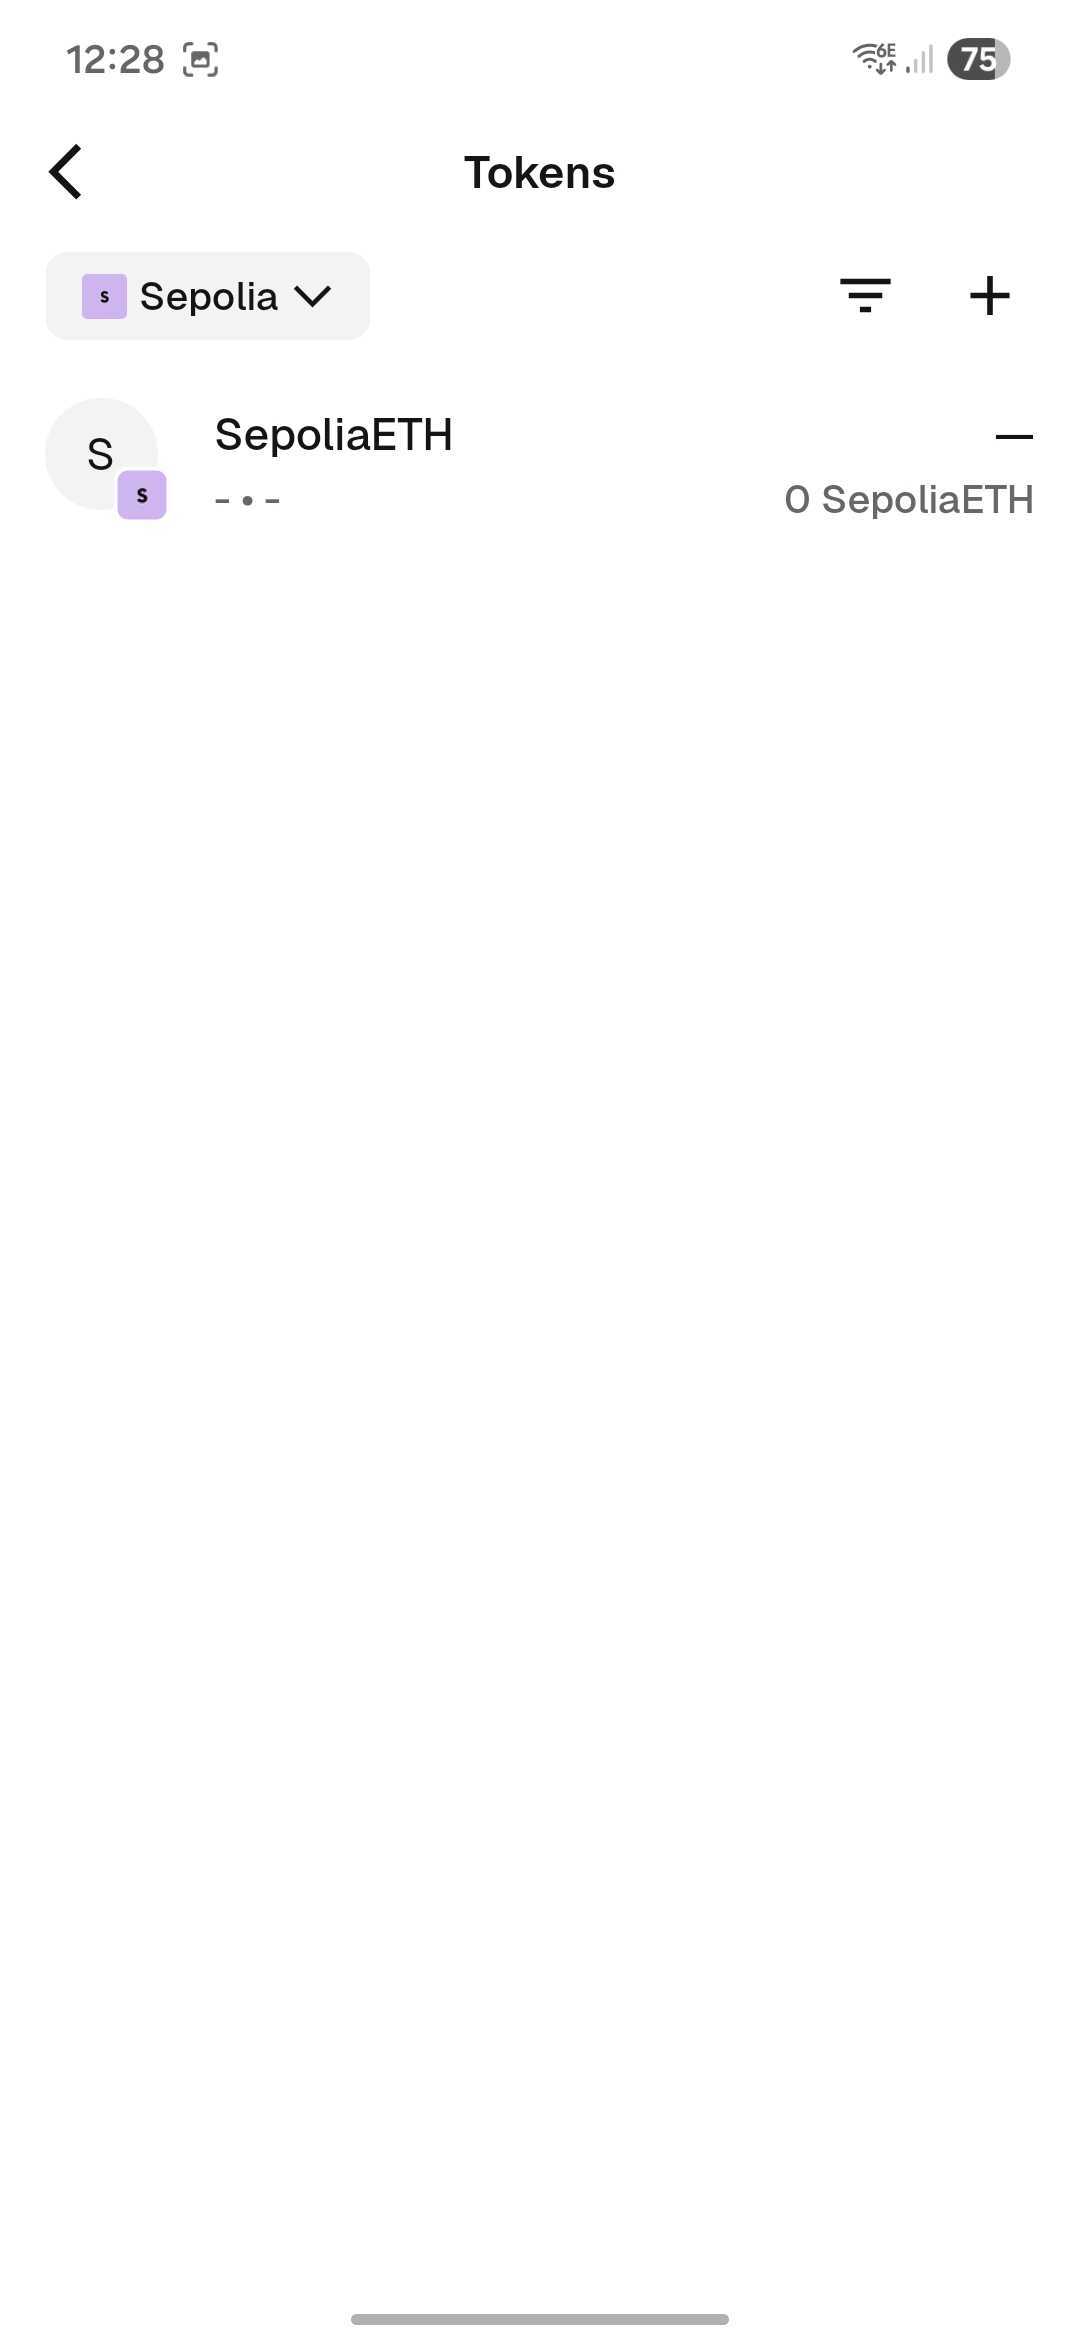
The Tokens screen should then show SepoliaETH:
4. Add the Hubpay sandbox USDC token
Hubpay sandbox uses the following USDC token on Ethereum Sepolia:
| Field | Value |
|---|---|
| Network | Ethereum Sepolia |
| Token contract | 0x9ae0a3978101f507d6eeb3e96cacef0d1a9475ec |
| Token symbol | USDC |
| Token decimals | 6 |
The token may appear as USDC - Hextrust in a block explorer or wallet details.
To add it in MetaMask:
- Confirm that Sepolia is selected.
- Open the Tokens tab.
- Select the + button or Manage tokens, then choose Custom token or Add custom token. The label varies by MetaMask version.
- Paste
0x9ae0a3978101f507d6eeb3e96cacef0d1a9475ecinto the token contract address field. - Confirm that the symbol is
USDCand the decimals value is6. - Select Next, then Import.
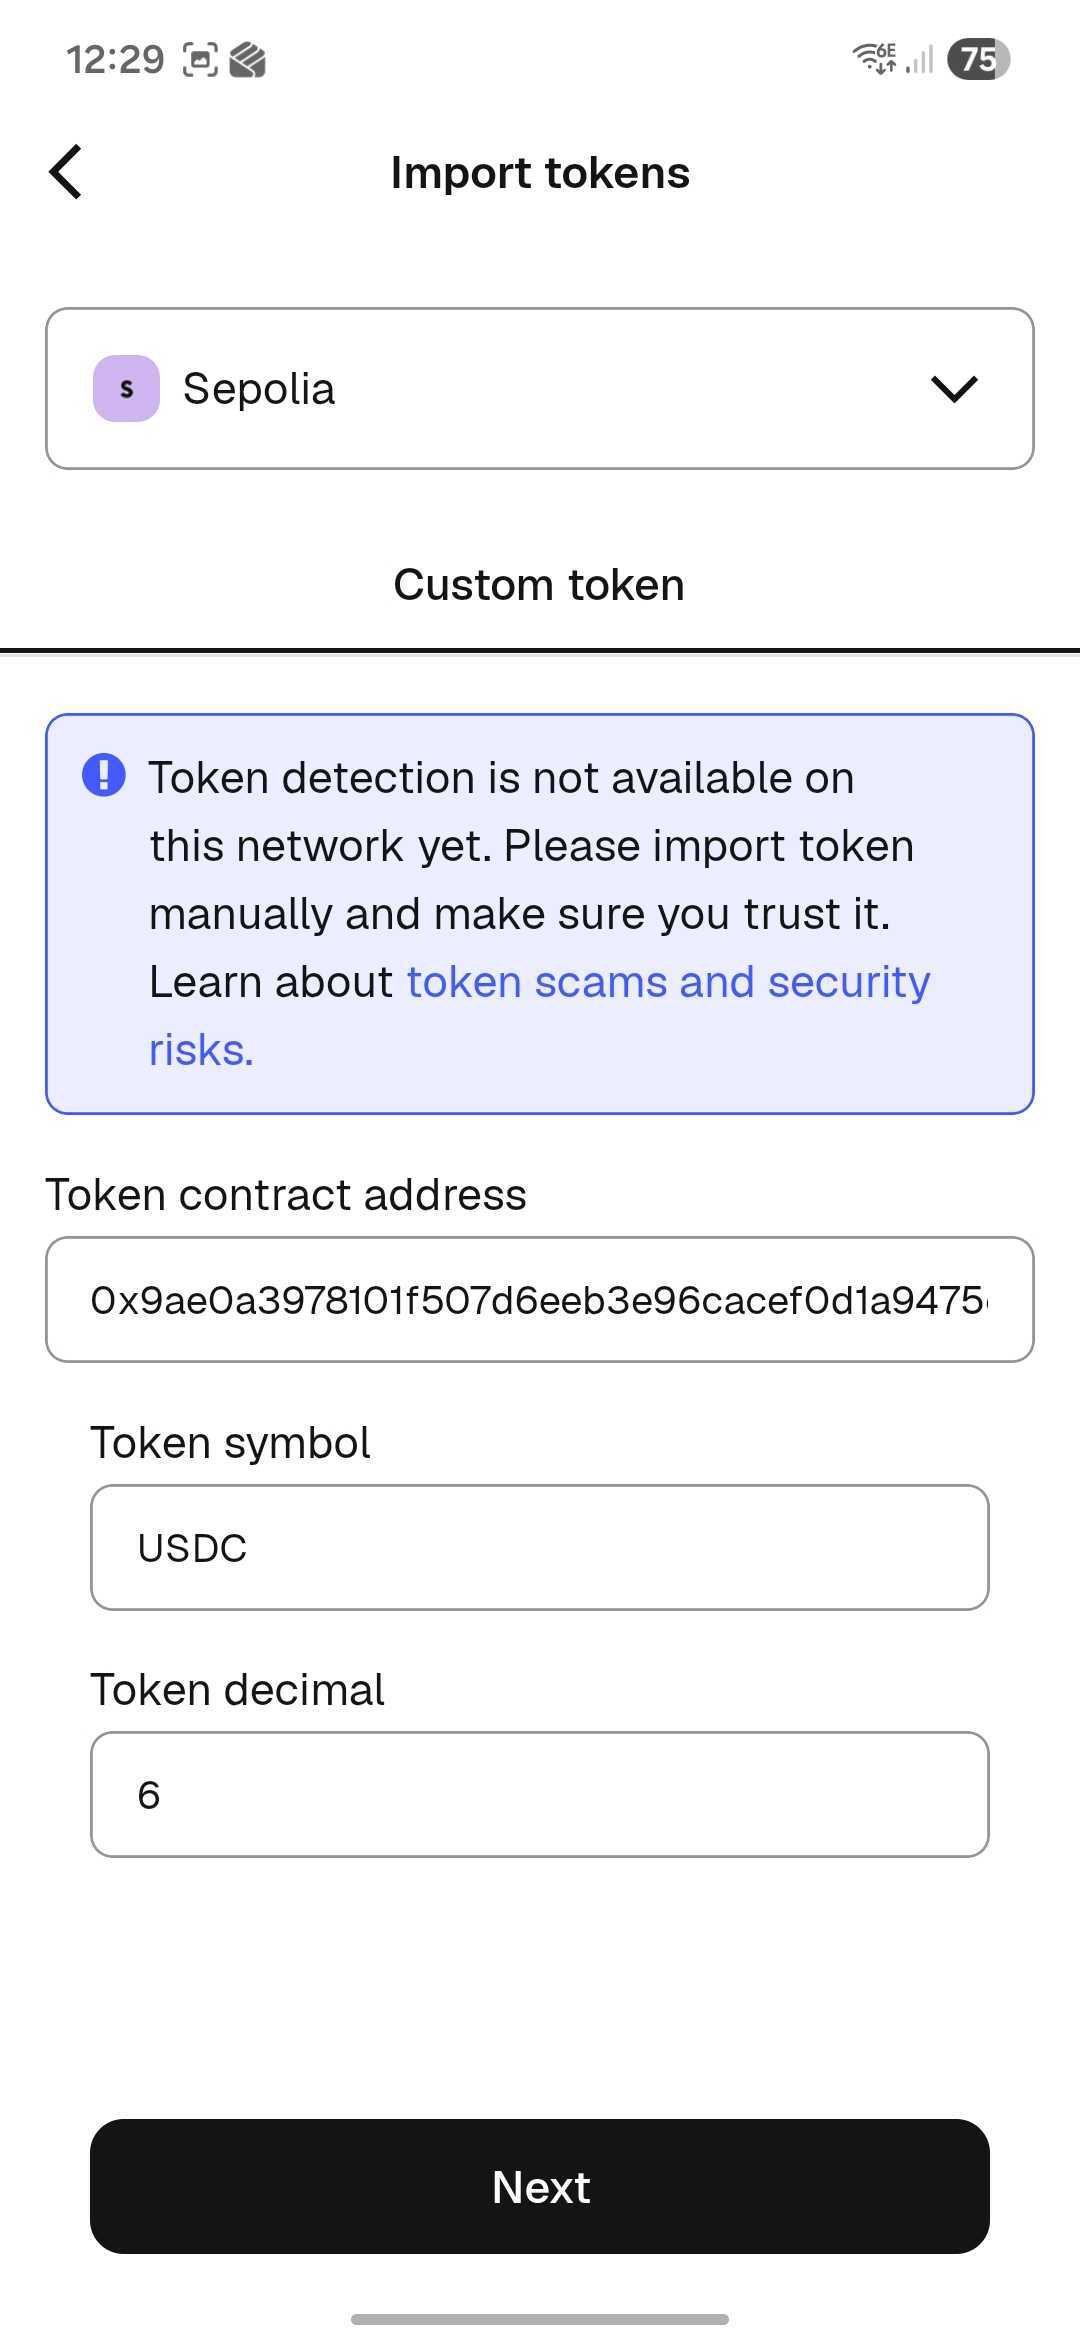
Enter the contract details on the Custom token screen:
MetaMask should identify the token as USDC - Hextrust. Review the details, then select Import:
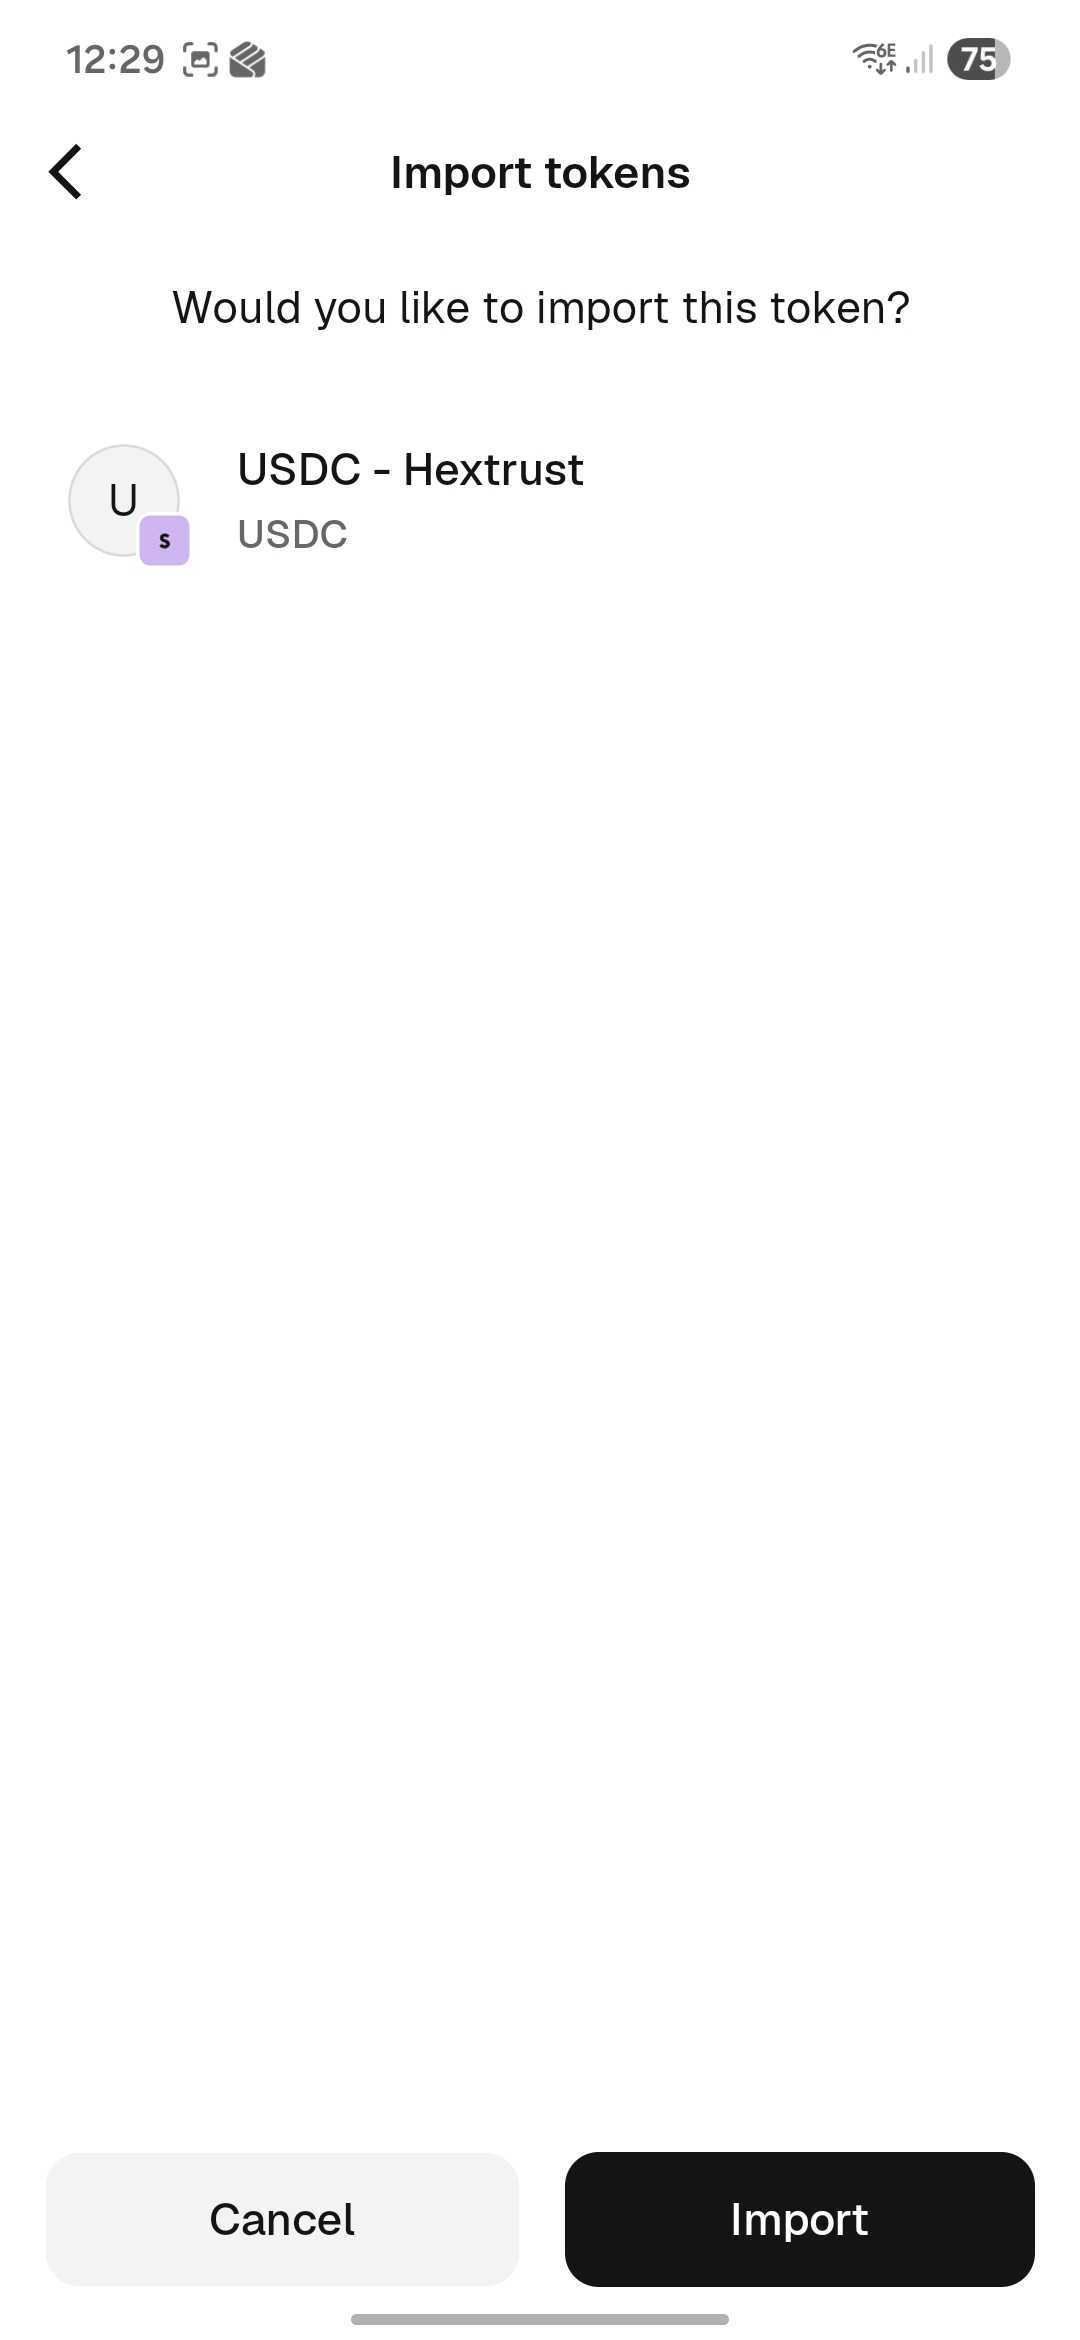
The import confirmation means MetaMask has saved the correct token contract. In some MetaMask Mobile versions, USDC - Hextrust does not appear in the Tokens list until the wallet receives a non-zero USDC balance. This is expected; continue with the receiving-address and funding steps below.
Token names and symbols are not unique. Circle's public Ethereum Sepolia USDC contract and other tokens named USDC are different assets and are not the Hubpay sandbox token. Do not request USDC from the Circle faucet for this checkout.
5. Copy your receiving address
You do not need to open USDC to find its receiving address. Sepolia ETH and every Ethereum Sepolia token in the same MetaMask account use the same public address.
- While viewing Sepolia, select Receive under SepoliaETH, or select the shortened
0x...address beneath the account name. - Copy the Ethereum & EVM address.
- Confirm that the address begins with
0x.
Your public wallet address is safe to share with Hubpay integration support. Never share your recovery phrase or private key.
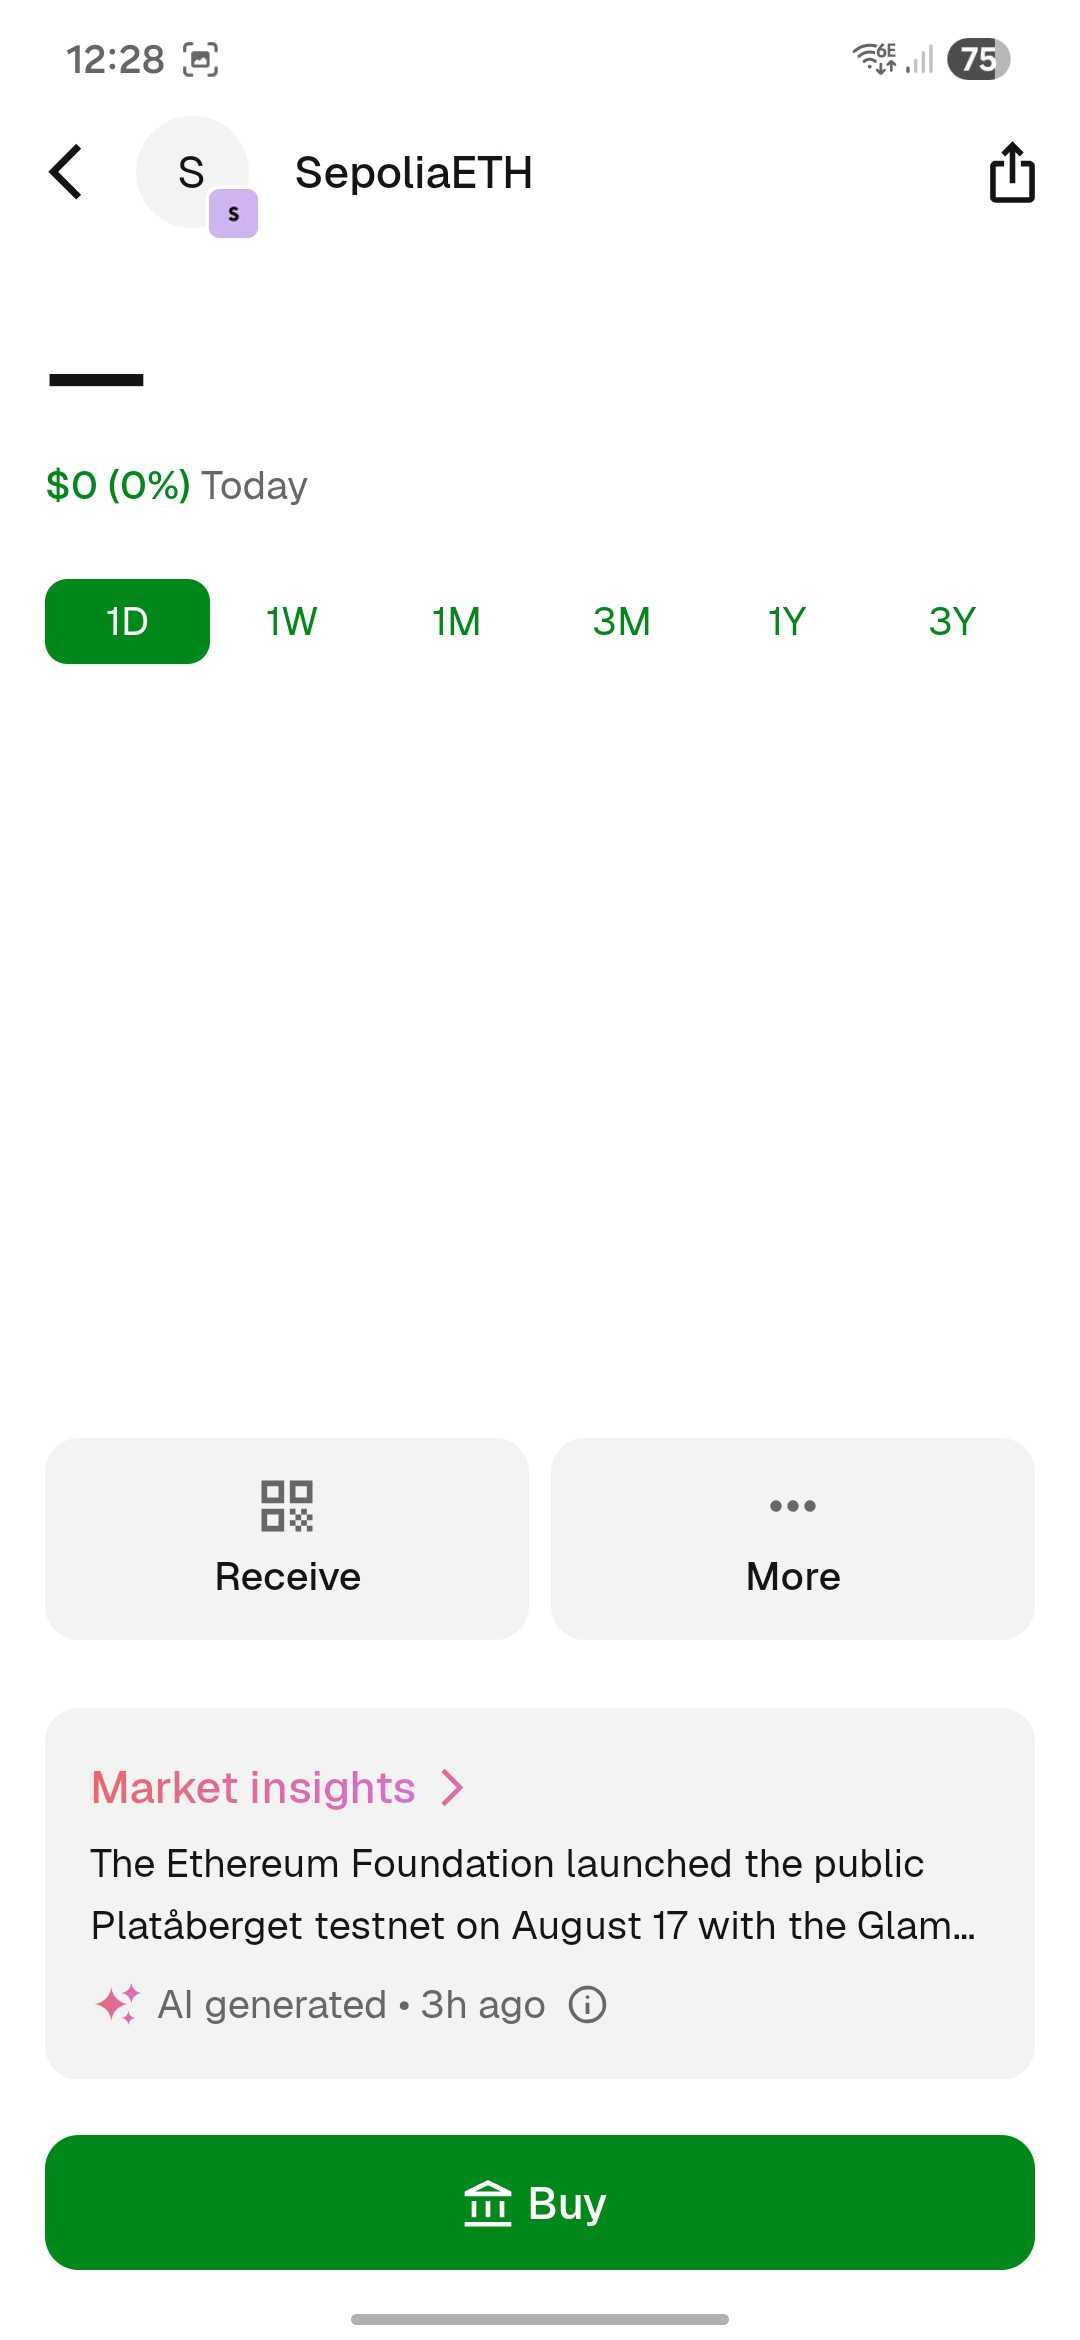
On mobile, select Receive from the SepoliaETH screen:
6. Request test funds
Wallet setup and token import do not add a balance. An on-chain sandbox payment needs:
- Hubpay sandbox USDC for the payment.
- A small amount of Sepolia ETH to pay the network fee, also called gas.
Request Hubpay sandbox USDC
Contact Hubpay integration support and provide the public wallet address you copied in the previous section. Hubpay will send the supported USDC.
Top up Sepolia ETH for gas
You can request free Sepolia ETH from a testnet faucet. For example, use the Google Cloud Ethereum Sepolia faucet:
- Copy your MetaMask public address as described in the previous section.
- Open the Google Cloud Ethereum Sepolia faucet.
- Sign in if requested.
- Paste your public
0x...wallet address into the faucet. - Request the Sepolia ETH and wait for the transaction to complete.
- Return to MetaMask, open Tokens, select Sepolia and refresh the wallet.
Faucet limits and availability can change. If the faucet does not fulfil the request, contact Hubpay integration support for an approved alternative.
Use the Google Cloud faucet only for Sepolia ETH. It does not provide the Hubpay sandbox USDC token required for the payment.
Do not buy ETH or USDC for a sandbox test, and never send real ETH to the test wallet for gas.
Check that the wallet is funded
After both transfers are complete, open MetaMask's Tokens tab, make sure Sepolia is included in the network filter, and refresh the wallet.
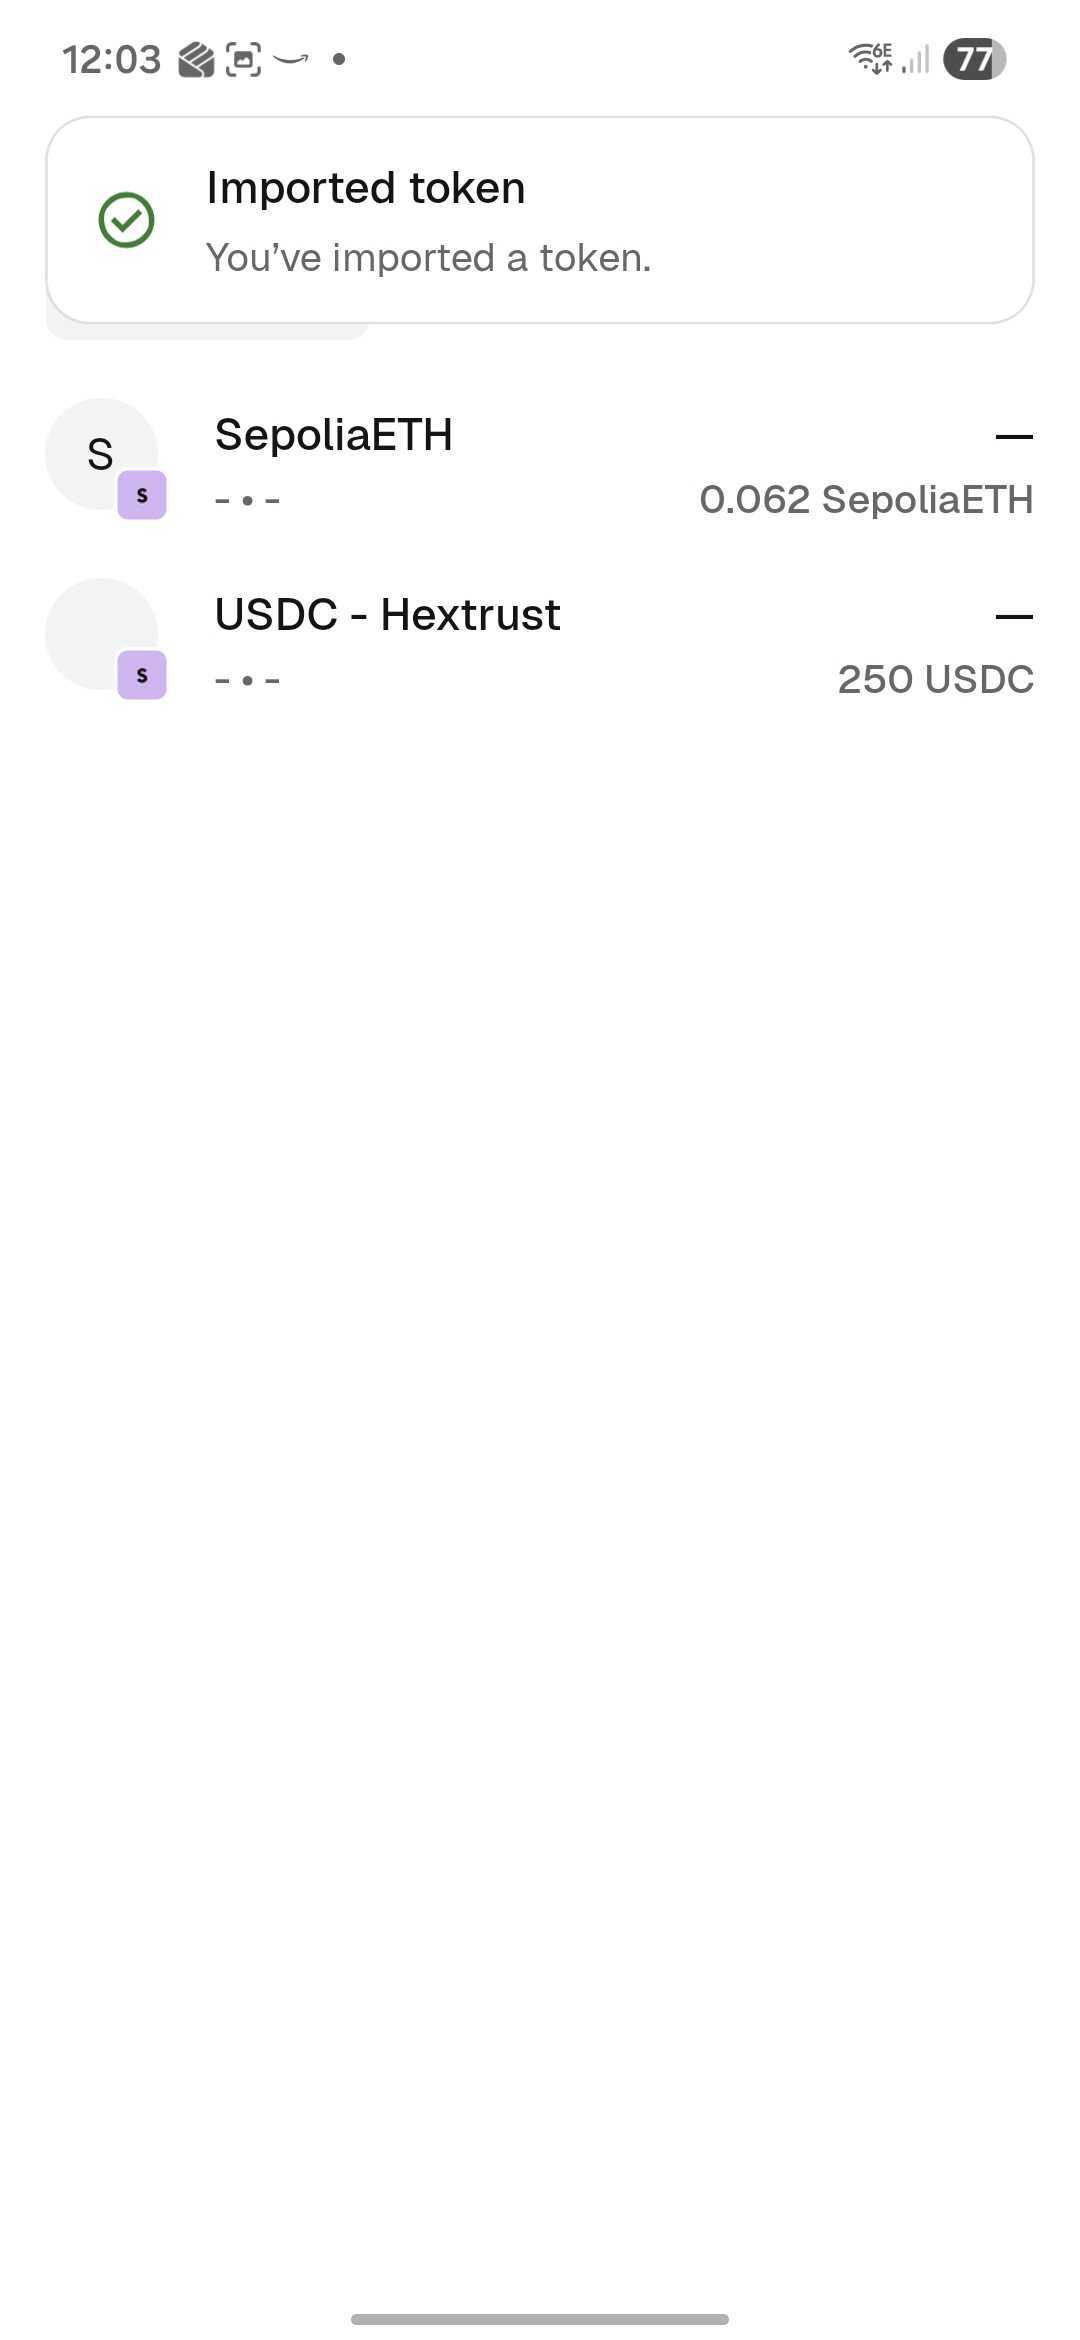
A successful setup shows:
- A non-zero SepoliaETH balance for gas.
- A non-zero USDC - Hextrust balance for the sandbox payment.
The exact balances will be different from this example:
If Hubpay has sent USDC but it still does not appear, open Manage tokens, enable USDC, include Sepolia in the network filter, and refresh MetaMask.
7. Complete the sandbox payment
- Open the crypto-enabled Hubpay sandbox payment URL:
- Mobile: open the URL in MetaMask's in-app browser so the checkout can connect to MetaMask.
- Desktop: open the URL in the browser where the MetaMask extension is installed and unlocked.
- Select Cryptocurrency.
- Select USDC and Sepolia.
- Connect MetaMask.
- Confirm that MetaMask still shows Sepolia before approving anything.
- Send the exact amount shown by Hubpay.
Connecting MetaMask may ask you to approve the connection or sign a verification message. It must never ask you to type your recovery phrase or private key into the checkout page.
See Pay a Hubpay payment link for the checkout screens. Confirm the result using Payment lifecycle and webhooks, not only the browser confirmation screen.
Troubleshooting
| Problem | What to check |
|---|---|
| Sepolia is missing | Open Networks, turn on Show test networks, then select Sepolia |
| Only SepoliaETH is visible | If the wallet has not received USDC yet, this is expected. Import the Hubpay contract, then request test funds from Hubpay integration support |
| USDC was imported but is not listed | Open Manage tokens and enable USDC, include Sepolia in the Tokens network filter, then refresh MetaMask |
| USDC has the wrong contract | Remove or hide it, then import 0x9ae0a3978101f507d6eeb3e96cacef0d1a9475ec on Sepolia |
The address does not begin with 0x | Select the Ethereum & EVM account address |
| The wallet reports insufficient gas | Request Sepolia ETH from the Google Cloud faucet above or ask Hubpay integration support for an approved alternative; do not add real ETH |
| MetaMask Mobile does not connect | Open the checkout URL in MetaMask's in-app browser rather than Safari or Chrome |
| The desktop checkout does not detect MetaMask | Confirm the extension is installed and unlocked, disable other wallet extensions temporarily, then refresh the checkout page |
| A website asks for the recovery phrase | Stop immediately and close the page. A legitimate wallet connection never needs it |
After testing, switch away from Sepolia before using MetaMask for anything else.